From product demos to upcoming event promos, videos are a dynamic element to add to any website. Here’s how to use the video widget to your advantage.
To start, navigate to your K Factors Dashboard, then choose the website you’d like to add your video to.
Next, click “Create Notification”, and choose the Video widget template. Make sure to give it a name, and then click “Create”.
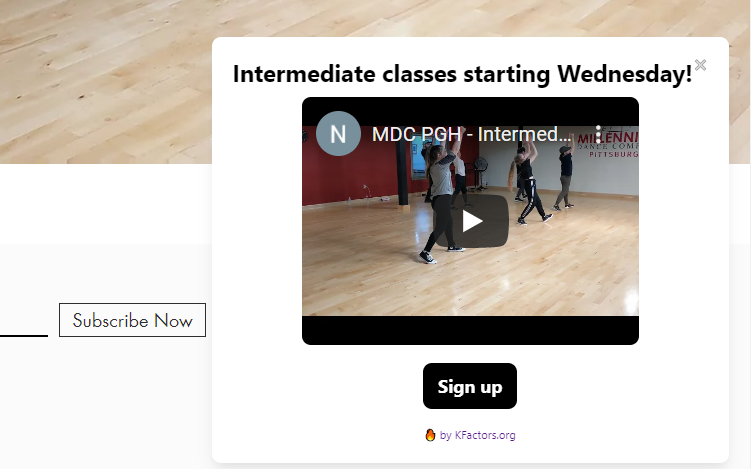
As an example, let’s make a video promo for a new dance class offering.

Your title message and button text should both be short, and describe exactly what your users are getting themselves into, so to speak.
The only potentially nonintuitive part of filling in your basic settings is the YouTube Video Embed URL.
This URL is not the same as the URL of your video itself. Rather, every YouTube video has an I.D. It’s the string of letters at the end of your video URL.
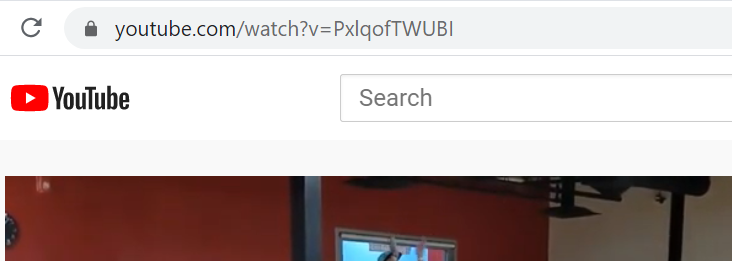
To properly fill out your YouTube Video Embed URL, simply leave the beginning of the URL that’s already in the box. Cut the ending part of the example URL, leaving https://youtube.com/embed/.
Copy the video I.D. (the string of letters at the end of your video) and paste them to the end of the example URL.
In this example, my YouTube Video Embed URL is: http://youtube.com/embed/PxlqofWUBI
You should be able to see your YouTube video in your widget preview.
Your button URL should take your users to a sensible place: If you’re having a sale, then the Shop page. If you’re having an event, then the Signup place (which is where this example video takes you).
Your trigger and customization settings are up to you. Videos don’t start playing automatically, and you do have the option to show a close button.
Finally, make sure your video widget is set to Active, and your users will see your video live on your site, just about instantaneously.