At this point, you should have your Pixel copied and ready to add to your Wix site. If not, click here, then come back.
Log onto your Wix account. Choose the domain you want to add the code to. On the left side of your screen is the menu. Scroll down to “Settings > Advanced Settings > Tracking Tools”.
On the top right, click “New Tool”, and select “Custom”.
Your screen should look like this:
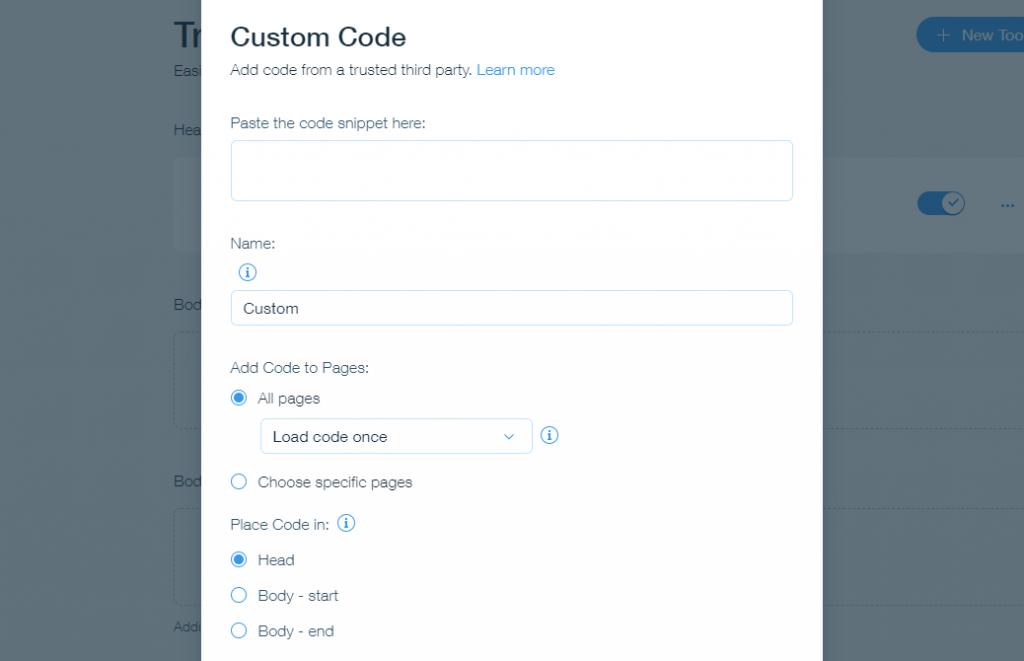
Now paste your Pixel code snippet where it says “Paste code snippet here”.
Give your Custom Code a name, like K Factors. (We’re a little biased about the name, but it should reflect what exact tool you’re using to convert leads into consumers.)
Select “All Pages”. Doing this is how you can add new notifications without actually having to code, ever.
For “Paste Code in”, make sure to choose “Head”. This is how the K Factors app finds your pages and knows where to put notifications.
Then, at the bottom of the box, choose “Apply”. (It’s not shown in the picture above, but we promise it’s there.)
And that’s that.
Now let’s get to the fun part: setting up new notifications.