At this point, you should have your Pixel copied and ready to add to your WordPress site. If not, click here, then come back.
When it comes to adding tools to WordPress sites, the standard line of action is to find a plugin and install it. As of right now, we do not have a dedicated WordPress plugin for installation. (But this will change soon.)
However, there is a plugin you can install to add any Pixel to your WordPress site. It’s called PixelYourSite, and it has become very popular (we use it ourselves). Don’t worry, it’s free — and to the startup world, free is synonymous with accessibility (and hustle).
To start, log onto your WordPress site and then onto your website’s Dashboard.
Scroll down the left-hand side of the menu and click “Plugins > Add New.” A little farther down the page, you should see a “Search Plugins” search box. Type in “PixelYourSite” and hit Enter.

Choose “PixelYourSite – Your smart PIXEL (TAG) Manager.”
Our PixelYourSite is already activated, but you should see “Install Now” on your screen. Click on that. Once it has finished installing, click “Activate.”
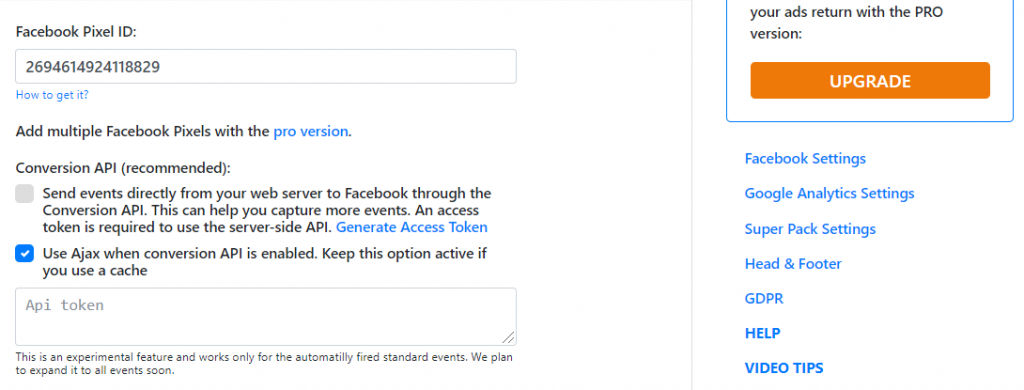
You now have a fully functional Pixel plugin that you’ll use to add your K Factors pixel to your WordPress site, and you should see it when you scroll down the menu on the left side of your screen. When you click it, you will be taken to a page that looks like this:

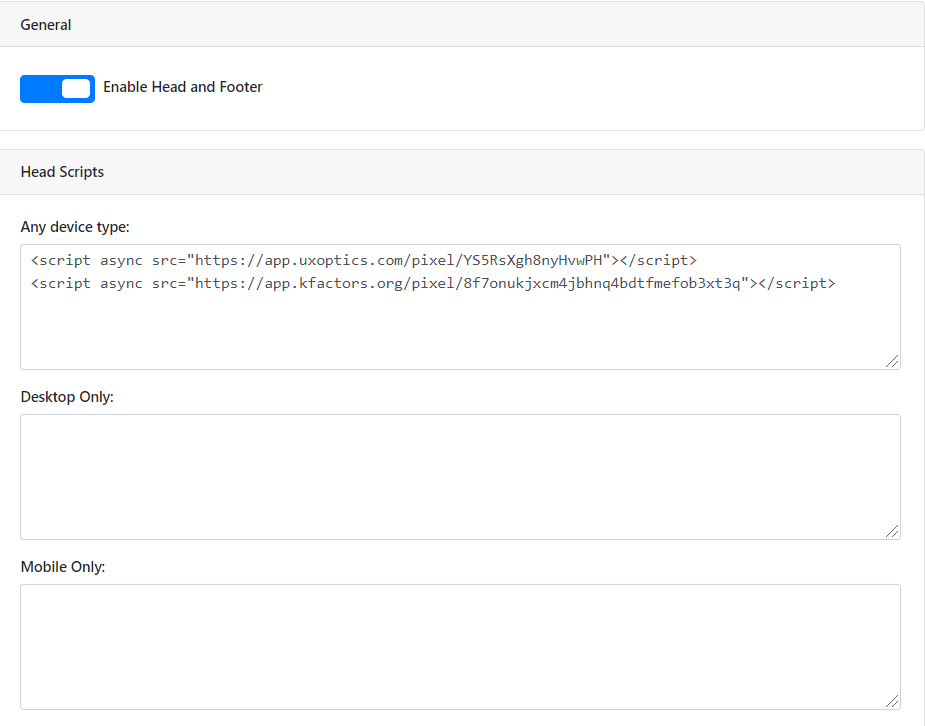
On the right side of the screen, click “Header and Footer.” And that page should look like this:

Now, just add the line of K Factors Pixel code to the Header Scripts section. Note that we have some extra code written in our Head Scripts section. If you have anything like this, be sure to paste your K Factors code on the next line under any other coding.
At the bottom of the page, click “Save Settings”, and you’re done.
Now let’s get to the fun part: setting up new notifications.