Installing K Factors is the one and only time you will need to touch any kind of coding. And it’s a copy-paste scenario, so it’s pretty much impossible to mess up anything about your website. It’s the thing making you money, so you’ll want to keep that intact.
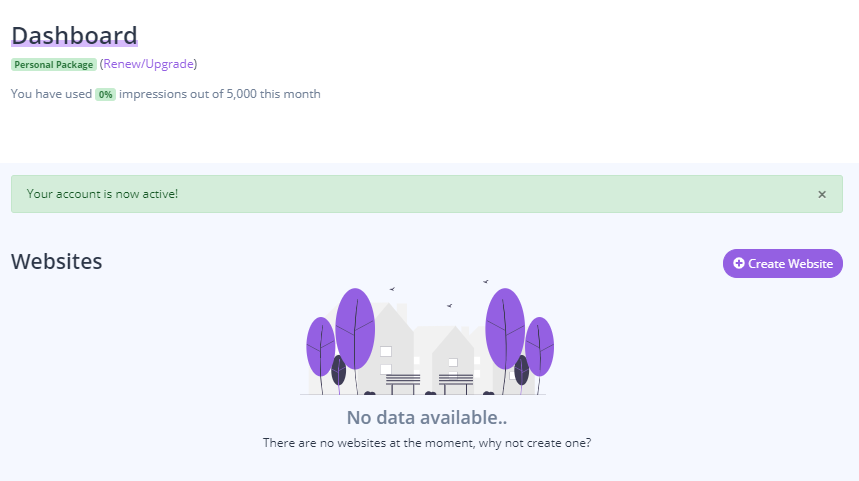
Once you sign up for a plan, you’ll get an activation link verifying your email. Click on that, and you’ll be taken directly to your dashboard. It will look like this:

Step 1: Adding your domain information.

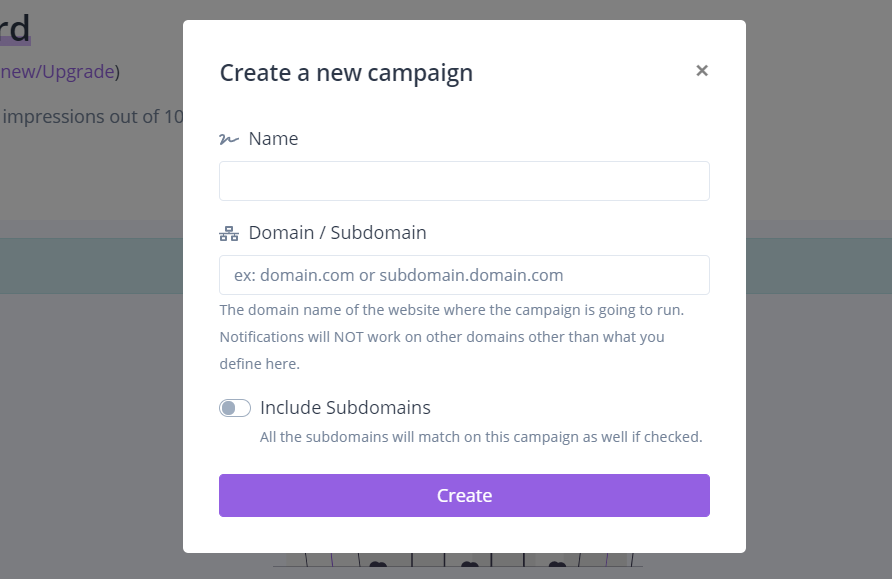
To add K Factors to your website, click Create Website in the top right-hand corner. The pop-up box will prompt you to put the name of your “campaign” (you can create different notifications within your campaign, so you can title it something like the name of your website).
Then it asks for your domain name. K Factors currently integrates with any major web builder (WordPress, Wix, Squarespace). Make sure to type your domain name correctly, or your notifications will not show up. We recommend using the URL of your homepage. Doing this allows you to put notifications on every page, if you want, without installing any more code than the single one you’ll use below.
You can also toggle on the Subdomain, which will allow your notifications to be displayed on subdomains. This is useful if you have e-commerce stores (shop.yoursite.com) or cloud-based apps (app.yoursite.com).
Step 2: Copy and paste the Pixel code to your site.

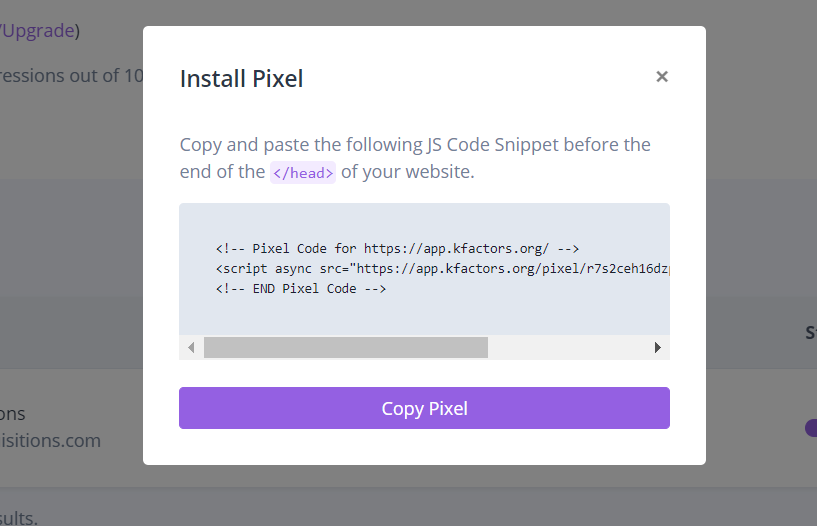
Once you enter your website’s information, a line of code will show up. This is the Pixel.
How you install the line of code is dependent on your particular website.
Note: It’s important that you keep your Pixel copied and ready to paste to your website. If you accidentally lose your Pixel in your clipboard, then you can just go and copy this line of code again.